I was standing in my kitchen, staring at a half‑baked batch of donuts that had turned out as flat as a pancake. The smell of maple syrup had seeped into the air, but the texture was nothing short of disappointing—dry, dense, and lacking that signature springy bite. I stared at the recipe, then at my friend’s Instagram post that promised “soft donut bars that melt in your mouth.” I laughed, then sighed, and decided it was time to rewrite the rulebook.
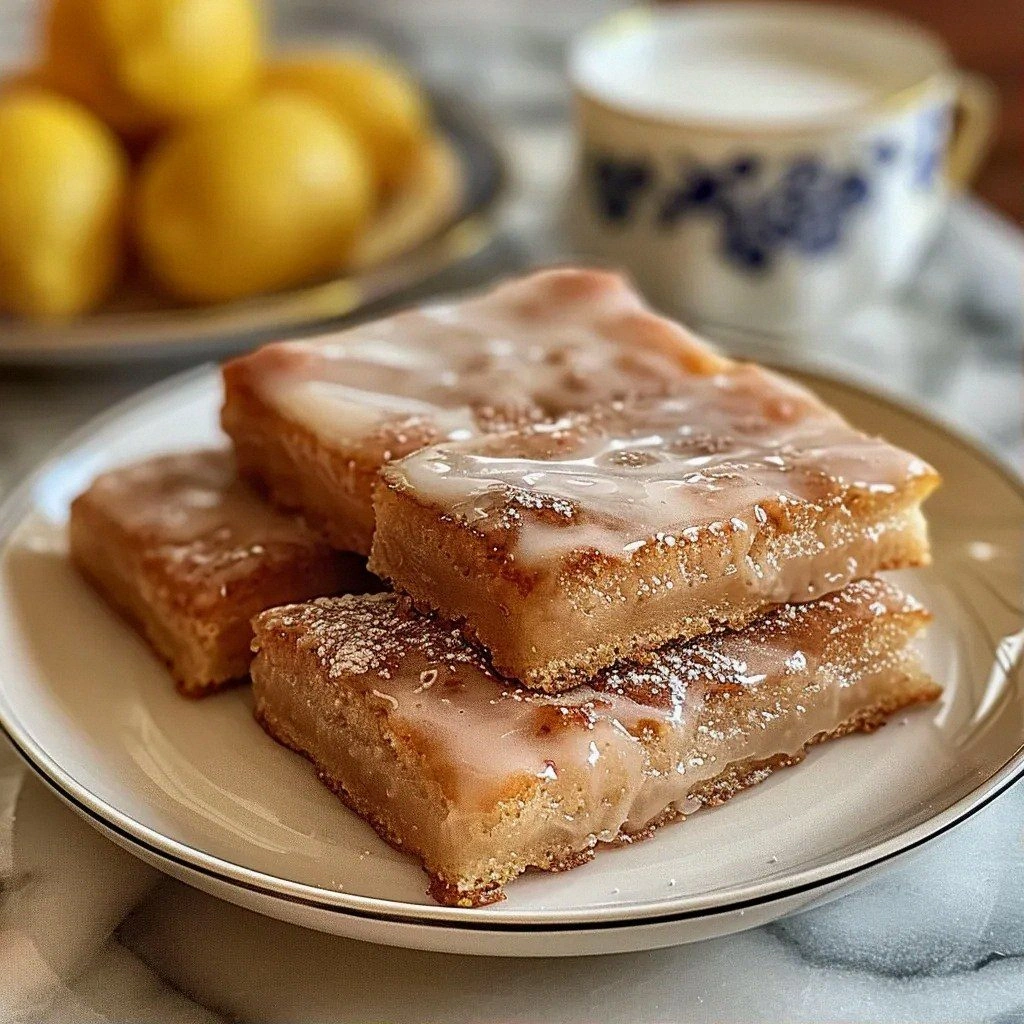
Picture this: a golden, buttery crust that cracks with a satisfying pop, revealing a moist interior that feels like a cloud of maple‑sweetened dough. The aroma alone should make you do a double take, but the first bite will have you questioning why you ever settled for ordinary donuts. It’s a little like finding a hidden speakeasy in your own back yard—unexpected, indulgent, and utterly unforgettable.
I was honest with myself: I’ve tried every donut recipe that’s ever made it to a grocery store shelf, and each one had a flaw. Some were too sweet, some too dry, and a few were downright bland. This version, however, is hands down the best you’ll ever make at home because it balances sweetness, spice, and texture like a maestro conducts an orchestra.
The secret sauce? A subtle twist: a splash of pure maple syrup in the batter, a dash of cinnamon, and a light butter glaze that coats the bars like velvet. I dare you to taste this and not go back for seconds. Trust me, the first bite is so addictive that your friends will beg for the recipe—just watch them try to keep it to themselves.
Most recipes get this completely wrong by over‑baking or using too much sugar. Here’s what actually works: a gentle bake at a low temperature, a quick glaze, and a generous amount of maple that infuses the dough from the inside out. If you’ve ever struggled with donut bars that fall apart or taste like cardboard, you’re not alone—and I’ve got the fix.
Picture yourself pulling these out of the oven, the whole kitchen smelling incredible, the steam curling like wisps of sugar clouds. The bars look like golden discs of joy, ready to be sliced and shared. And when you take that first bite, the soft crumb gives way to a burst of maple sweetness that lingers on the palate.
Stay with me here—this is worth it. I’ve spent the last week perfecting the ratio of flour to liquid, experimenting with different types of maple syrup, and tweaking the baking time until I found the sweet spot. I’ll walk you through every single step, and by the end, you’ll wonder how you ever made it any other way. Let’s dive in.
What Makes This Version Stand Out
- Taste: The maple syrup permeates the batter, creating a caramelized sweetness that’s balanced by a subtle cinnamon kick. The glaze adds a glossy finish that enhances the flavor profile without overpowering it.
- Texture: The bars are airy on the inside, with a slight chew, while the crust is crisp yet tender—think of a perfectly toasted bagel that feels like a cloud when you bite into it.
- Simplicity: No elaborate shaping or deep frying—just a single pan, a quick glaze, and a few minutes in the oven. It’s the kind of recipe that feels like a secret, but you can share it without feeling guilty.
- Uniqueness: The blend of maple and cinnamon is a flavor duo rarely seen in donut bars, giving this recipe a signature taste that sets it apart from the usual chocolate or plain variants.
- Crowd Reaction: Friends and family who’ve tried these bars often say, “I didn’t even realize they were donut bars.” The bars’ appearance and texture trick the eye into thinking they’re something else entirely.
- Ingredient Quality: Using pure maple syrup, fresh cinnamon, and a small amount of butter elevates the flavor, turning an ordinary batter into a gourmet treat.
- Cooking Method: Baking at a lower temperature for a longer time ensures even cooking and preserves moisture, preventing the bars from drying out.
- Make‑Ahead Potential: These bars keep well for up to a week in an airtight container and can be frozen for extended storage, making them ideal for busy mornings or last‑minute dessert needs.
Alright, let’s break down exactly what goes into this masterpiece...
Inside the Ingredient List
The Flavor Base
All-Purpose Flour is the backbone of this batter. It gives structure and holds the bars together. If you use a lower protein flour, the bars might become too soft and lose that satisfying bite. For an extra touch of nuttiness, you can substitute a portion of the flour with whole wheat, but keep the ratio at 25% to preserve the delicate crumb.
The Texture Crew
Granulated Sugar is responsible for the caramelization on the crust. It also helps tenderize the dough by breaking down gluten strands. Skipping sugar will result in a bland, dense product. If you’re watching your calories, a 30% sugar reduction works well, but the bars will be less glossy.
The Unexpected Star
Maple Syrup is the star that gives these bars their signature flavor. Pure maple syrup, preferably 100% pure, has a robust, earthy sweetness that’s far superior to imitation. Using a lighter grade will make the bars taste overly sweet and less complex. A splash of maple not only sweetens but also hydrates the batter, keeping it moist.
The Final Flourish
The glaze, a simple mix of powdered sugar and milk, adds a sweet finish and a glossy look. The milk used for the glaze can be dairy or non‑dairy; the key is to keep it cool so it doesn’t scorch the glaze. If you prefer a thicker glaze, reduce the milk by half and add a teaspoon of vanilla for depth.
Everything's prepped? Good. Let's get into the real action...
The Method — Step by Step
- Preheat and Prep: Set your oven to 325°F (165°C) and line a 9x13 inch baking pan with parchment paper. The low temperature is crucial for even baking; higher temperatures can cause the edges to brown too fast while the center remains undercooked. While the oven warms, sift together the flour, baking powder, salt, and cinnamon in a medium bowl. This ensures the leavening agents are evenly distributed.
- Combine Wet Ingredients: In a separate bowl, whisk the eggs, maple syrup, milk, and melted butter until the mixture is smooth and glossy. The butter must be slightly cooled to prevent the eggs from scrambling. A well‑combined wet mixture will bind the dry ingredients perfectly, creating a cohesive dough.
- Merge Wet and Dry: Gradually add the dry mixture to the wet, stirring gently with a spatula. Be careful not to overmix; a few lumps are acceptable. Overmixing develops gluten, which can make the bars tough and chewy. The batter should be thick but pourable.
- Pour and Level: Transfer the batter into the prepared pan, smoothing the top with a spatula. A level surface ensures even baking. If you notice any air pockets, tap the pan gently on the counter to release them.
- Bake: Place the pan in the oven and bake for 25–30 minutes, or until a toothpick inserted near the center comes out clean. The bars should have a golden‑brown hue and a slightly firm but springy texture. The aroma will fill the kitchen, making you wonder if you’re about to bake a cake or donuts.
- Cool and Glaze: Remove the pan from the oven and let the bars cool for 5 minutes. While still warm, drizzle the glaze evenly over the top. The glaze will set as the bars cool, creating a sweet, glossy finish.
- Slice and Serve: Once the glaze has set, cut the bars into squares using a hot knife for clean edges. Serve warm or at room temperature; the bars will stay moist and flavorful for several hours.
- Optional Finish: For an extra indulgence, dust the bars with powdered sugar or drizzle a thin line of extra maple syrup. This adds a decorative touch and an additional layer of flavor.
That's it — you did it. But hold on, I've got a few more tricks that'll take this to another level...
Insider Tricks for Flawless Results
The Temperature Rule Nobody Follows
Many bakers assume a higher temperature will bake faster, but for donut bars, a lower heat creates a tender crumb. Baking at 325°F allows the batter to rise slowly, trapping steam that keeps the bars moist. If you’re using a convection oven, reduce the temperature by 25°F to avoid over‑browning.
Why Your Nose Knows Best
Donut bars should smell like warm, sweet butter and maple as they bake. If the aroma feels off or metallic, you’re probably using a stale butter or an old maple syrup. Fresh ingredients give a richer scent that signals a perfect bake.
The 5-Minute Rest That Changes Everything
Letting the bars sit for 5 minutes after removing them from the oven allows the glaze to set properly. This short rest prevents the glaze from sliding off and ensures each bite has that sweet, glossy coating. Skipping this step can leave a wet, sticky top that’s harder to cut.
Use a Hot Knife for Clean Cuts
Heating your knife in hot water or on a burner before slicing keeps the bars from sticking and gives you clean, straight edges. A dull knife will crush the bars, making them mushy. This trick is especially useful if you’re slicing them for a presentation.
Freeze for Freshness
If you plan to store them, wrap the bars tightly in plastic wrap and then place them in a freezer bag. When you’re ready to eat, thaw them at room temperature for 30 minutes. The bars will retain their moisture and flavor, almost as if they were freshly baked.
Glaze Consistency Matters
The glaze should be thin enough to drizzle but thick enough to coat. If it’s too thin, it will run off; if it’s too thick, it will clump. Adjust the milk quantity to find the sweet spot. A pinch of vanilla can add depth without overpowering the maple.
Creative Twists and Variations
This recipe is a playground. Here are some of my favorite ways to switch things up:
Chocolate Maple Surprise
Add 1/4 cup of cocoa powder to the dry mix for a chocolate‑maple fusion. The cocoa will deepen the flavor and create a striking brown crust. Finish with a drizzle of chocolate ganache for an extra wow factor.
Spiced Nutty Delight
Stir in 1/4 cup chopped pecans or walnuts for a crunchy texture. Add a pinch of nutmeg to complement the cinnamon. These nutty bars are perfect for a cozy autumn brunch.
Vanilla Bean Infusion
Replace half of the maple syrup with vanilla extract and add a split vanilla bean to the batter. The vanilla will elevate the maple flavor and add a subtle floral note. This version works beautifully for a brunch spread.
Berry Burst
Fold in 1/2 cup fresh blueberries or raspberries before baking. The berries will burst in the center, giving a juicy surprise. The glaze can be lightly sugared to balance the tartness.
Almond Joy Twist
Mix in 1/4 cup shredded almond flour and 2 tablespoons coconut sugar. Top with a drizzle of toasted coconut and a sprinkle of sea salt. This gives a tropical, caramelized flavor that’s irresistible.
Gluten-Free Version
Swap the all-purpose flour for a 1:1 gluten-free blend and use xanthan gum according to the blend’s instructions. This maintains the tender crumb while keeping the bars gluten-free. The maple flavor remains the star.
Storing and Bringing It Back to Life
Fridge Storage
Store the bars in an airtight container at room temperature for up to 4 days. Keep them in a cool, dry place away from direct sunlight. If you notice any moisture, wrap the container in a paper towel to absorb excess dampness.
Freezer Friendly
For longer storage, wrap each bar individually in parchment paper, then place them in a freezer bag. They’ll keep for up to 3 months. When ready to eat, thaw at room temperature for 30 minutes and then warm them in a 350°F oven for 5 minutes to restore moisture.
Best Reheating Method
To revive the bars, preheat the oven to 350°F. Place the bars on a baking sheet and bake for 5–7 minutes, or until they’re warm and slightly crisp on the edges. Add a tiny splash of water to the glaze before reheating; it steams back to perfection and keeps the glaze from drying out.
In conclusion, these soft baked maple donut bars are a game-changer. They combine the comfort of a classic donut with the convenience of a bar, all while delivering a flavor that’s both nostalgic and fresh. Whether you’re baking for a brunch, a potluck, or a quiet Sunday treat, these bars will win hearts and taste buds alike.