Picture this: I’m standing in my cramped kitchen, the timer on the oven ticking like a metronome, and a half‑eaten batch of store‑bought “chewy bar” sitting smugly on the counter. I had promised my roommate I’d bring something that would make her forget about the endless stream of bland snack options that have invaded our pantry. I stared at that sad, pre‑packaged bar and thought, “If this is the best you can do, I’m about to turn it into a masterpiece.” I grabbed the last of my graham crackers, melted butter that smelled like toasted gold, and a handful of chocolate chips that practically begged to be melted. The whole scene smelled like a nostalgic carnival mixed with a bakery that never closed, and my heart raced faster than a blender on puree.
The first whiff of butter hitting the pan was a siren song—rich, nutty, and promising a buttery crust that would crunch like fresh‑baked shortbread. As the crumbs toasted, a faint caramel scent rose, mingling with the sweet coconut that reminded me of tropical vacations and beach bonfires. I could hear the faint crackle of the crust forming, a sound that felt like a promise of the perfect bite. My fingertips tingled as the warm mixture clung to the pan, and I felt a surge of confidence that this would be the most unforgettable treat I’d ever crafted. I dared you to taste this and not go back for seconds—trust me, you’ll be begging for more.
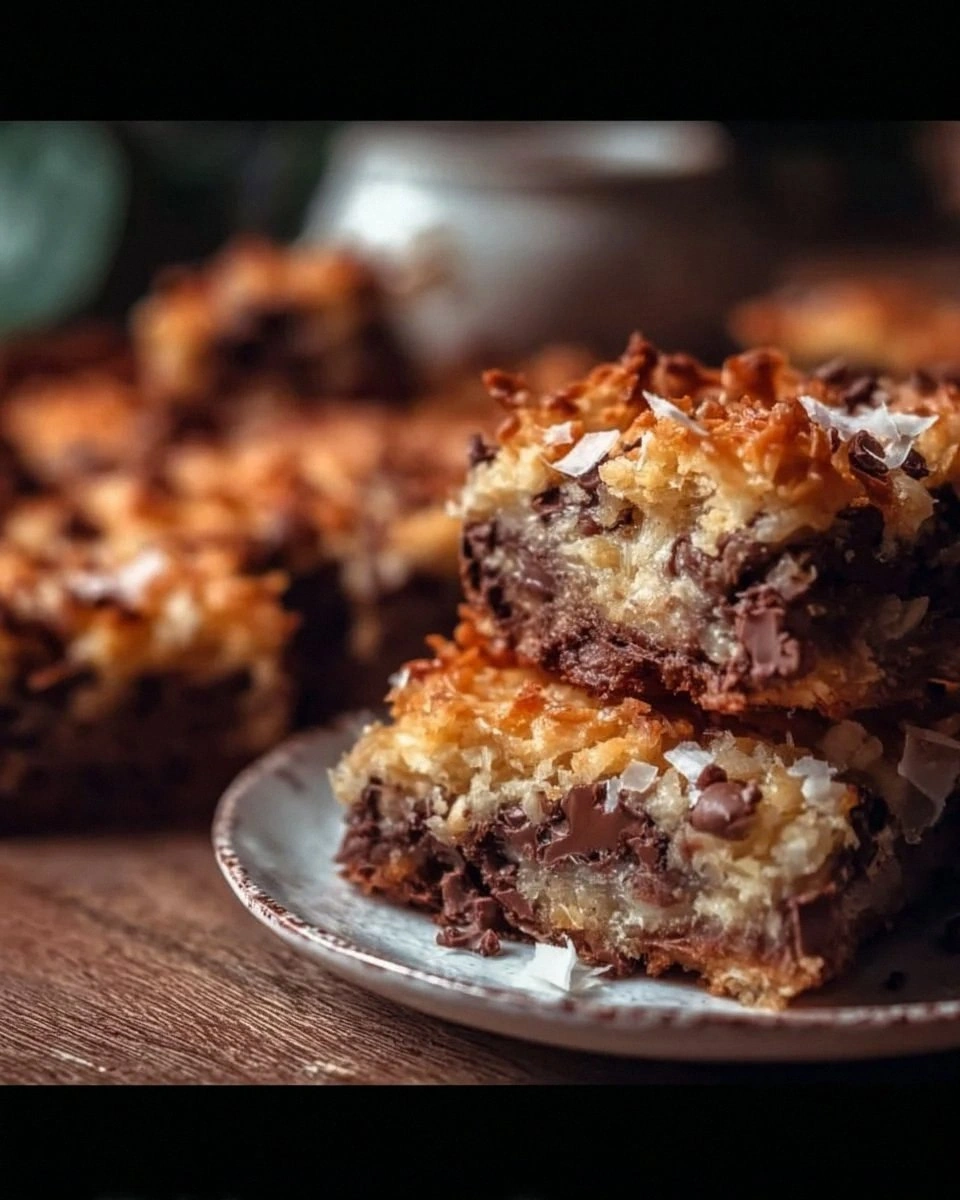
Most recipes for “millionaire bars” get the balance of sweet, salty, and crunchy wrong, ending up either soggy or overly sweet. This version, however, is a symphony of textures: a buttery, crumbly base, a chewy coconut‑chocolate layer, and a glossy, buttery top that snaps like a fresh candy bar. The secret? A splash of melted butter in the crust and a precise ratio of butterscotch to chocolate that creates a flavor depth you didn’t know existed. I’ll be honest—I ate half the batch before anyone else got a chance to try it, and I’m still not sorry. This is hands down the best version you’ll ever make at home, and I’m about to spill every detail.
Let me walk you through every single step—by the end, you’ll wonder how you ever made it any other way. Okay, ready for the game‑changer? This next part? Pure magic. Stay with me here — this is worth it.
What Makes This Version Stand Out
- Texture: The crust is buttery and crisp, the middle layer is chewy yet airy, and the top melts in your mouth with a glossy snap that shatters like thin ice.
- Flavor Depth: Butterscotch chips add a caramel‑like richness that balances the semi‑sweet chocolate, while shredded coconut brings a tropical hint.
- Simplicity: Only seven ingredients, no fancy equipment, and a single pan—perfect for busy weeknights or lazy weekends.
- Ingredient Quality: Using real butter and high‑quality chocolate makes the difference between “good” and “millionaire‑level.”
- Crowd Reaction: These bars disappear faster than free Wi‑Fi at a coffee shop; expect empty plates and applause.
- Make‑Ahead Potential: They keep fresh for days and even freeze beautifully, so you can prep ahead for parties.
- Versatility: Swap walnuts for pecans, add a pinch of sea salt, or drizzle with caramel for an extra wow factor.
- Cooking Method: Baking, not stovetop, ensures an even, golden finish without the mess of a stovetop caramel.
Inside the Ingredient List
The Flavor Base
The graham cracker crumbs are the unsung hero, providing a sweet, slightly spicy foundation that holds everything together. They absorb the melted butter, turning into a golden, buttery canvas that’s crisp on the edges and tender in the center. If you skip them, you’ll lose the structural integrity and the subtle caramel notes that make the bars feel luxurious. You can substitute with digestive biscuits for a milder flavor, but the signature graham taste is what elevates this recipe.
The Texture Crew
Unsalted melted butter is the glue that binds the crust; its richness ensures a melt‑in‑your‑mouth crumb that doesn’t get soggy. Use real butter, not margarine—the difference is like night and day in flavor and mouthfeel. Granulated sugar adds a subtle crunch to the base and helps the crust brown evenly. If you’re watching sugar, you can cut it in half; just expect a slightly less caramelized crust.
The Unexpected Star
Sweetened shredded coconut is the surprise element that brings a chewy, tropical texture, making each bite feel like a mini vacation. It also adds a natural sweetness, reducing the need for extra sugar. If you’re allergic or not a fan, try toasted oat flakes for a similar chew without the coconut flavor. The coconut also helps absorb any excess moisture from the chocolate layers, keeping the bars from getting soggy.
The Final Flourish
Semi‑sweet chocolate chips and butterscotch chips are the dynamic duo that create the signature “millionaire” flavor. The chocolate provides a deep cocoa backbone, while the butterscotch adds a buttery caramel nuance that makes the top layer glossy and decadent. Chopped walnuts or pecans contribute a nutty crunch and a buttery richness that rounds out the texture profile. If you’re nut‑free, swap with toasted pumpkin seeds for a similar crunch without the allergen risk.
Everything's prepped? Good. Let's get into the real action...
The Method — Step by Step
Preheat your oven to 350°F (175°C) and line a 9×13‑inch baking pan with parchment paper, leaving an overhang on the sides for easy removal. The heat should be steady, like a warm hug for the batter. While the oven warms, gather all your ingredients; having everything measured out will keep you from frantic rummaging later.
In a large mixing bowl, combine 1 cup graham cracker crumbs, ½ cup melted butter, and ¼ cup granulated sugar. Stir with a wooden spoon until the mixture resembles wet sand—think beach shore at low tide, each grain clinging together. Power transition: This is the moment where the crust takes shape.
Press the crumb mixture firmly into the prepared pan, spreading it out to the edges. Use the back of a flat measuring cup to smooth it; you want a compact layer that won’t crumble when you cut the bars later.
Kitchen Hack: Chill the crust for 5 minutes before adding the topping; this firms it up and prevents sogginess.While the crust rests, melt 1 cup semi‑sweet chocolate chips and 1 cup butterscotch chips together in a microwave‑safe bowl, heating in 30‑second bursts and stirring in between. The mixture should become a smooth, glossy river of chocolate that smells like a candy shop after a rainstorm. Once fully melted, set aside for a minute to thicken slightly.
Stir in 1 cup sweetened shredded coconut and ½ cup chopped walnuts or pecans into the melted chocolate mixture. The coconut will soften, and the nuts will become lightly toasted by the residual heat, releasing an aromatic nutty perfume. This is where the magic truly begins—watch the colors meld into a deep amber.
Pour the chocolate‑coconut‑nut mixture over the chilled crust, spreading it evenly with a spatula. The top should be glossy and thick, like a chocolate blanket that promises indulgence.
Watch Out: If the chocolate starts to set before you finish spreading, gently re‑warm it for 10 seconds; otherwise you’ll get uneven patches.Place the pan in the preheated oven and bake for 20‑25 minutes, or until the edges of the crust turn a golden‑brown hue and the chocolate topping looks set but still slightly wobbly in the center. You’ll hear a faint crackle as the crust solidifies—this is your cue that the bars are nearing perfection.
Kitchen Hack: Rotate the pan halfway through baking for an even golden top.Remove the pan from the oven and let it cool on a wire rack for at least 30 minutes. As it cools, the chocolate will firm up, creating that coveted snap when you break a piece. I dare you to taste this and not go back for seconds—resist at your own peril.
Once fully cooled, lift the bars out using the parchment overhang and place on a cutting board. Slice into 12 equal squares with a sharp knife warmed under hot water; this prevents the chocolate from cracking unevenly. Serve immediately or store as described later. And now the fun part: watch your friends’ faces light up as they bite into pure decadence.
Insider Tricks for Flawless Results
The Temperature Rule Nobody Follows
Always bake at a true 350°F; oven hotspots can cause uneven browning. If your oven tends to run hot, lower the temperature by 10‑15 degrees and add a couple of extra minutes. I once tried to speed things up by cranking the heat to 400°F—let's just say the crust burnt and the chocolate turned into a bitter mess. Use an oven thermometer to be sure; precision is the secret behind that perfect golden edge.
Why Your Nose Knows Best
Don’t rely solely on a timer—trust your sense of smell. When the crust starts to emit a buttery, caramel scent, you’re close to the ideal color. The moment you detect a faint toasty note, it’s time to start checking the top. This sensory checkpoint prevents over‑baking and keeps the chocolate glossy rather than dry.
The 5‑Minute Rest That Changes Everything
After removing the bars from the oven, let them rest uncovered for five minutes before cooling completely. This brief pause lets the steam escape, preventing a soggy bottom. It also allows the chocolate to set just enough so you can cut clean slices without shattering the crust. Skipping this step is a common mistake that leads to crumbly, uneven pieces.
Nut Toasting Shortcut
Instead of toasting nuts separately, fold them into the hot chocolate mixture; the residual heat does the job. This not only saves time but also infuses the nuts with a deeper flavor as they absorb the buttery chocolate. If you prefer extra crunch, give them a quick toss in a dry skillet for 2‑3 minutes before mixing.
Chocolate Shine Boost
For an ultra‑shiny finish, brush the top with a thin layer of melted butter right after baking, while the bars are still warm. The butter adds a glossy sheen and a subtle richness that makes the bars look bakery‑grade. This is the trick I use when I want to impress guests at a last‑minute gathering.
Creative Twists and Variations
This recipe is a playground. Here are some of my favorite ways to switch things up:
Salted Caramel Drizzle
After the bars have cooled, drizzle a thin stream of homemade salted caramel over the top. The salty‑sweet contrast elevates the butterscotch flavor, making each bite feel like a gourmet treat. Perfect for those who love a hint of sea‑salt on their desserts.
White Chocolate & Raspberry
Swap the semi‑sweet chocolate chips for white chocolate and fold in freeze‑dried raspberry pieces. The tangy raspberry cuts through the richness, creating a bright, festive flavor profile ideal for spring gatherings.
Peanut Butter Swirl
Mix ¼ cup creamy peanut butter into the chocolate topping before spreading, creating a marbled effect. The nutty peanut butter pairs beautifully with the butterscotch, delivering a nostalgic “peanut butter cup” vibe.
Espresso Infusion
Add 1 tablespoon instant espresso powder to the chocolate mixture for a mocha twist. The coffee notes deepen the chocolate flavor, making the bars an excellent after‑dinner pick‑me‑up.
Gluten‑Free Version
Replace graham cracker crumbs with a blend of gluten‑free oat flour and almond meal. The texture stays delightfully crumbly, and the almond adds a subtle buttery note that complements the coconut.
Holiday Spice
Stir in ½ teaspoon ground cinnamon and a pinch of ground nutmeg into the chocolate layer for a warm, festive flavor. This variation shines during the colder months and pairs well with a cup of hot cider.
Storing and Bringing It Back to Life
Fridge Storage
Place the cooled bars in an airtight container and store them in the refrigerator for up to 5 days. The cool environment keeps the chocolate firm and the crust crisp, ready for a quick snack.
Freezer Friendly
Wrap each bar individually in parchment paper, then place them in a freezer‑safe zip‑top bag. They’ll stay fresh for up to 3 months. When you’re ready to enjoy, let them thaw at room temperature for 15 minutes.
Best Reheating Method
To revive that melt‑in‑your‑mouth texture, warm the bar in a microwave for 10‑12 seconds, or place it on a warm plate for a minute. Add a tiny splash of water to the plate before reheating; the steam brings the chocolate back to its glossy glory without drying it out.