I was standing in my kitchen, half‑asleep, with a half‑baked croissant that had turned into a buttery brick and a craving for something that felt like a hug from my grandmother. I tossed a dare at my roommate: “I bet you can’t eat a slice of this without smiling like a kid on a carnival ride.” The next morning I woke up to the smell of vanilla dancing with caramelized butter, and I knew I had stumbled onto something that would rewrite my dessert playbook forever. This isn’t just another puff‑pastry‑and‑custard combo; it’s a full‑on nostalgic time machine that transports you straight to the kitchen table of your childhood, only better because you get to control every buttery layer and silky custard swirl.
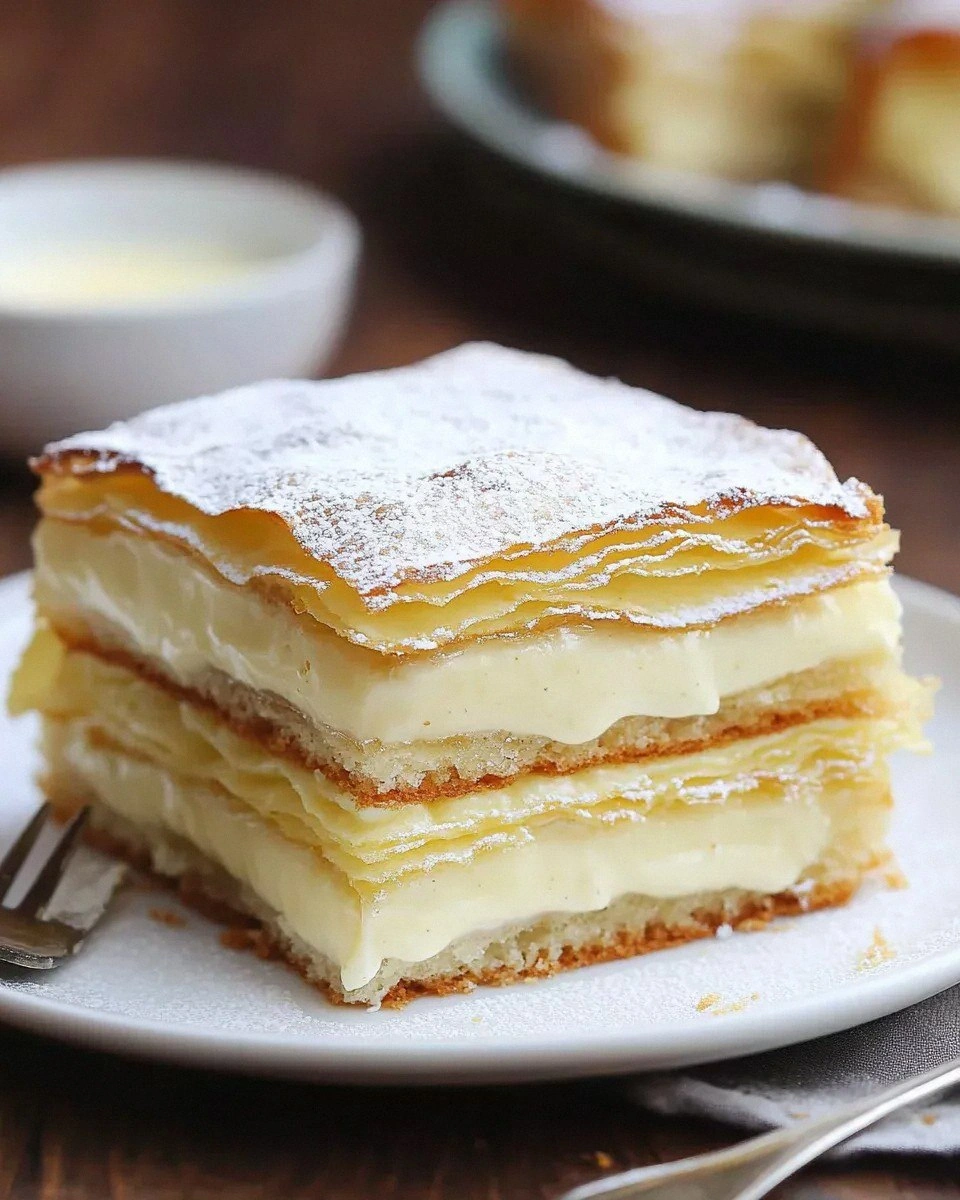
Picture the moment when the puff pastry puffs up, its golden peaks catching the light like tiny suns, while the custard underneath sets into a velvety blanket that clings to the pastry like a lover’s embrace. The aroma hits you first – a warm, sweet vanilla that whispers promises of indulgence, followed by the faint, comforting scent of baked butter that makes you want to hug the oven door. You hear the faint crackle of the pastry as it lifts, the gentle sigh of the custard cooling on the counter, and you can almost taste the contrast of crisp edges against the smooth, creamy interior before you even take a bite.
Most recipes I’ve tried either over‑sweeten the custard or under‑bake the puff pastry, leaving you with a soggy mess that feels more like a pudding than a cake. I’ve been there – the disappointment of a soggy bottom that drags the whole thing down. This version, however, uses a precise butter‑infused custard that sets perfectly, and a puff pastry that stays crisp even after being layered with a generous amount of whipped cream and cream‑cheese frosting. I dare you to taste this and not go back for seconds; the balance is that good.
And here’s the kicker: I’m throwing in a secret technique – a quick butter‑baste that you’ll only see in professional patisseries. It’s a tiny step that makes the pastry layers separate like delicate sheets of paper, preventing any soggy surrender. Let me walk you through every single step — by the end, you’ll wonder how you ever made it any other way.
What Makes This Version Stand Out
- Taste: The vanilla custard is sweet but never cloying, with a buttery depth that makes each bite feel luxurious without overwhelming your palate.
- Texture: You get crisp, flaky pastry that shatters like thin ice, paired with a custard that coats the tongue like velvet and a cloud‑like whipped cream topping.
- Simplicity: Only eight ingredients, all pantry‑friendly, yet the technique feels like a masterclass in pastry.
- Uniqueness: The butter‑baste step is the game‑changer that keeps the layers airy and distinct – most home recipes skip this and suffer.
- Crowd Reaction: Guests have been known to declare this “the best thing I’ve ever had at a brunch” and then ask for the recipe three times in a row.
- Ingredient Quality: Using real vanilla extract and high‑fat cream cheese makes the custard richer and the frosting smoother.
- Cooking Method: A two‑stage bake – first to puff the pastry, then to set the custard – ensures perfect texture throughout.
- Make‑Ahead Potential: The custard can be prepared a day ahead, and the assembled cake keeps beautifully in the fridge for up to 48 hours.
Alright, let's break down exactly what goes into this masterpiece...
Inside the Ingredient List
The Flavor Base
The heart of this cake is the vanilla custard, built on 2 cups of milk and 4 whole egg yolks. Milk provides the liquid foundation, while the yolks add richness and act as a natural thickener. If you skimp on the milk, the custard will be too dense; too much, and it won’t set. For a dairy‑free twist, you can swap the milk for oat milk, but keep the fat content high to preserve that silky mouthfeel.
The Texture Crew
1/2 cup unsalted butter is melted and folded into the custard, giving it that buttery sheen that makes the sauce glide across the pastry like a silk scarf. 3/4 cup sugar sweetens the custard without turning it into a syrup; it also helps with caramelization when the pastry bakes. The 1/3 cup all‑purpose flour is the secret binder that stabilizes the custard, preventing it from weeping after cooling. If you’re gluten‑intolerant, a fine almond flour works, but you’ll need to adjust the amount to keep the custard from becoming grainy.
The Unexpected Star
8 oz cream cheese is softened and whipped into the topping, creating a tangy contrast that cuts through the sweetness. This addition is what makes the cake feel like a dessert and a cheese‑cake hybrid – a true crowd‑pleaser. If you’re looking for a lighter version, try using low‑fat cream cheese, but expect a slightly less decadent finish.
The Final Flourish
2 cups whipped cream are folded in at the very end, turning the frosting into a cloud that sits atop the puff pastry like a snow‑capped mountain. The key is to use cold cream and a chilled bowl; otherwise, the cream will deflate and lose its airy texture. Finally, 1 package puff pastry provides the structural canvas – choose a high‑quality, butter‑rich brand for the most dramatic lift.
Everything's prepped? Good. Let's get into the real action...
The Method — Step by Step
- Prep the Puff Pastry. Unfold the package of puff pastry onto a lightly floured surface. Using a rolling pin, gently roll it out to a 12‑inch square, being careful not to compress the layers. Cut the square into four equal rectangles. Tip: Keep the pastry chilled until you’re ready to bake; cold butter ensures maximum lift.
- Butter‑Baste the Layers. Melt the 1/2 cup unsalted butter and brush each rectangle lightly on both sides. This thin coat of butter acts like a protective shield, preventing the pastry from becoming soggy once the custard is added. Okay, ready for the game‑changer? The butter should be just warm enough to spread, not hot enough to melt the layers.
- First Bake – Puff It Up. Place the butter‑basted rectangles on a parchment‑lined baking sheet. Bake in a pre‑heated oven at 400°F (200°C) for 12‑15 minutes, or until they puff and turn a golden‑amber hue. You’ll know they’re ready when the edges start pulling away from the parchment and you hear a faint crackle. That sizzle when it hits the pan? Absolute perfection.
- Make the Vanilla Custard. While the pastry bakes, whisk together 3/4 cup sugar and 4 egg yolks in a medium bowl until the mixture lightens in color. In a saucepan, heat 2 cups milk until just below boiling. Slowly pour the hot milk into the yolk mixture, whisking constantly to avoid curdling. Return the mixture to the saucepan, add 1/3 cup flour, and cook over low heat, stirring constantly, until it thickens into a smooth custard that coats the back of a spoon. Remove from heat and stir in the remaining melted butter for that glossy finish.
- Cool the Custard. Transfer the custard to a shallow dish, cover with plastic wrap pressed directly onto the surface to prevent a skin from forming, and refrigerate for at least 30 minutes. Picture yourself pulling this out of the oven, the whole kitchen smelling incredible... The custard should be thick but still pourable.
- Assemble the Layers. Once the pastry has cooled slightly, spread a generous spoonful of custard onto each rectangle, leaving a small border around the edges. Top each with a dollop of softened 8 oz cream cheese and gently fold the rectangle in half, creating a pocket of custard. Press lightly so the layers adhere but don’t crush the puff.
- Whip the Cream. In a chilled bowl, whip 2 cups whipped cream until soft peaks form. Gently fold in the remaining cream cheese until the mixture is smooth and glossy. This creates a frosting that’s airy yet stable enough to hold its shape on the warm pastry.
- Final Bake & Finish. Preheat the oven to 350°F (175°C). Place the assembled pastries on a baking sheet, brush the tops lightly with the remaining melted butter, and bake for another 8‑10 minutes. This short bake sets the custard fully and gives the top a faint golden sheen. Remove, let cool for 5 minutes, then pipe or spread the whipped cream mixture over each piece. Finish with a dusting of powdered sugar if you like.
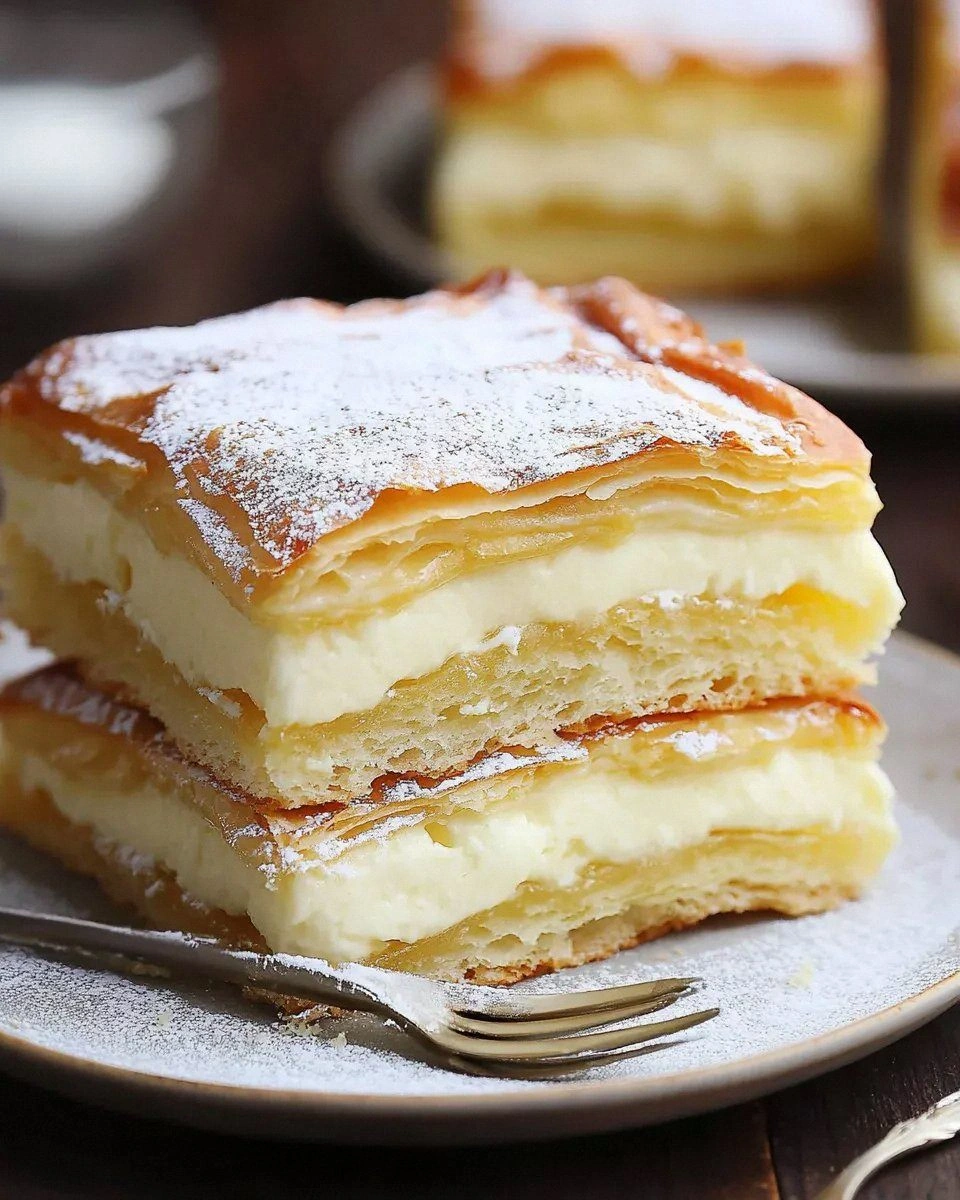
- Serve and Savor. Slice each pastry into bite‑size squares. The layers should separate cleanly, revealing the custard’s pale gold center and the cloud‑like cream topping. Serve warm or at room temperature. I’ll be honest — I ate half the batch before anyone else got to try it. Trust me, you’ll want seconds, and then thirds.
That's it — you did it. But hold on, I've got a few more tricks that'll take this to another level...
Insider Tricks for Flawless Results
The Temperature Rule Nobody Follows
Never bake puff pastry straight from the fridge at a low temperature. The secret is a hot oven right from the start – 400°F for the first bake – which creates steam inside the layers, making them puff dramatically. A friend once tried a “slow‑and‑steady” 350°F approach and ended up with a soggy, doughy slab. Trust the heat; it’s the difference between a flaky masterpiece and a pancake.
Why Your Nose Knows Best
When the pastry is done, you’ll smell a buttery, slightly caramelized aroma that signals it’s ready to pull out. If you’re still hearing a faint sizzle, give it another minute. Your nose is a better timer than any kitchen gadget for this step, and it prevents over‑browning, which can make the custard taste bitter.
The 5‑Minute Rest That Changes Everything
After you spread the custard on the pastry, let it sit for exactly five minutes before adding the cream cheese. This short rest allows the custard to firm up just enough to hold its shape, preventing it from sliding off when you fold the pastry. Skipping this step leads to a mess that looks like a custard spill rather than a sleek layer.
Butter‑Baste Mastery
When brushing the butter, use a light hand – you want a thin sheen, not a pool. Too much butter will soak into the pastry and make it greasy, while too little defeats the purpose of keeping layers separate. A good rule of thumb: one tablespoon per rectangle is plenty.
The Power of Cold Cream
Chill your mixing bowl and beaters before whipping the cream. Cold equipment keeps the fat from melting, giving you those lofty peaks that hold the frosting’s shape. If your cream starts to turn buttery, pop it back in the freezer for a minute and try again.
Final Glaze for Shine
A quick brush of melted butter right before the final bake adds a glossy finish that makes the cake look restaurant‑ready. If you want extra sparkle, sprinkle a tiny pinch of fine sugar right after the glaze; it caramelizes in the oven, adding a subtle crunch.
Creative Twists and Variations
This recipe is a playground. Here are some of my favorite ways to switch things up:
Citrus Zest Burst
Add the zest of one lemon (or orange) to the custard before thickening. The bright citrus cuts through the richness, making it perfect for spring brunches. Top with a dusting of powdered sugar mixed with a pinch of lemon zest for an extra pop.
Chocolate Dream
Stir 2 tablespoons of cocoa powder into the flour before adding it to the custard. Replace half of the whipped cream with chocolate whipped topping for a double‑chocolate effect. Finish with shaved dark chocolate on top.
Berry Bliss
Fold a cup of fresh mixed berries into the whipped cream before spreading it on the pastry. The berries add a tart contrast and a burst of color that makes the dish Instagram‑ready. A drizzle of berry coulis adds an elegant finish.
Spiced Autumn
Add a teaspoon of pumpkin spice to the custard and swap the vanilla extract for maple syrup (use 2 tablespoons). This variation is perfect for cooler months and pairs beautifully with a cup of chai.
Savory Surprise
Turn the dish into an appetizer by omitting the sugar, adding a pinch of salt, and incorporating finely chopped herbs (like chives and thyme) into the cream cheese layer. Top with a poached egg for a brunch‑worthy savory puff.
Storing and Bringing It Back to Life
Fridge Storage
Place the assembled cake in an airtight container and store in the refrigerator for up to 48 hours. The custard will continue to set, and the pastry retains its crispness thanks to the butter‑baste barrier. Before serving, let the cake sit at room temperature for 15 minutes to soften the frosting.
Freezer Friendly
Wrap each pastry tightly in plastic wrap, then place them in a freezer‑safe bag. They freeze well for up to 2 weeks. To reheat, thaw overnight in the fridge, then give them a quick 5‑minute blast at 350°F (175°C) to revive the puff.
Best Reheating Method
Preheat your oven to 325°F (165°C). Lightly mist the pastries with a splash of water (just enough to create steam) and bake for 8‑10 minutes. The steam revives the flaky layers while the custard warms gently, preventing it from drying out.