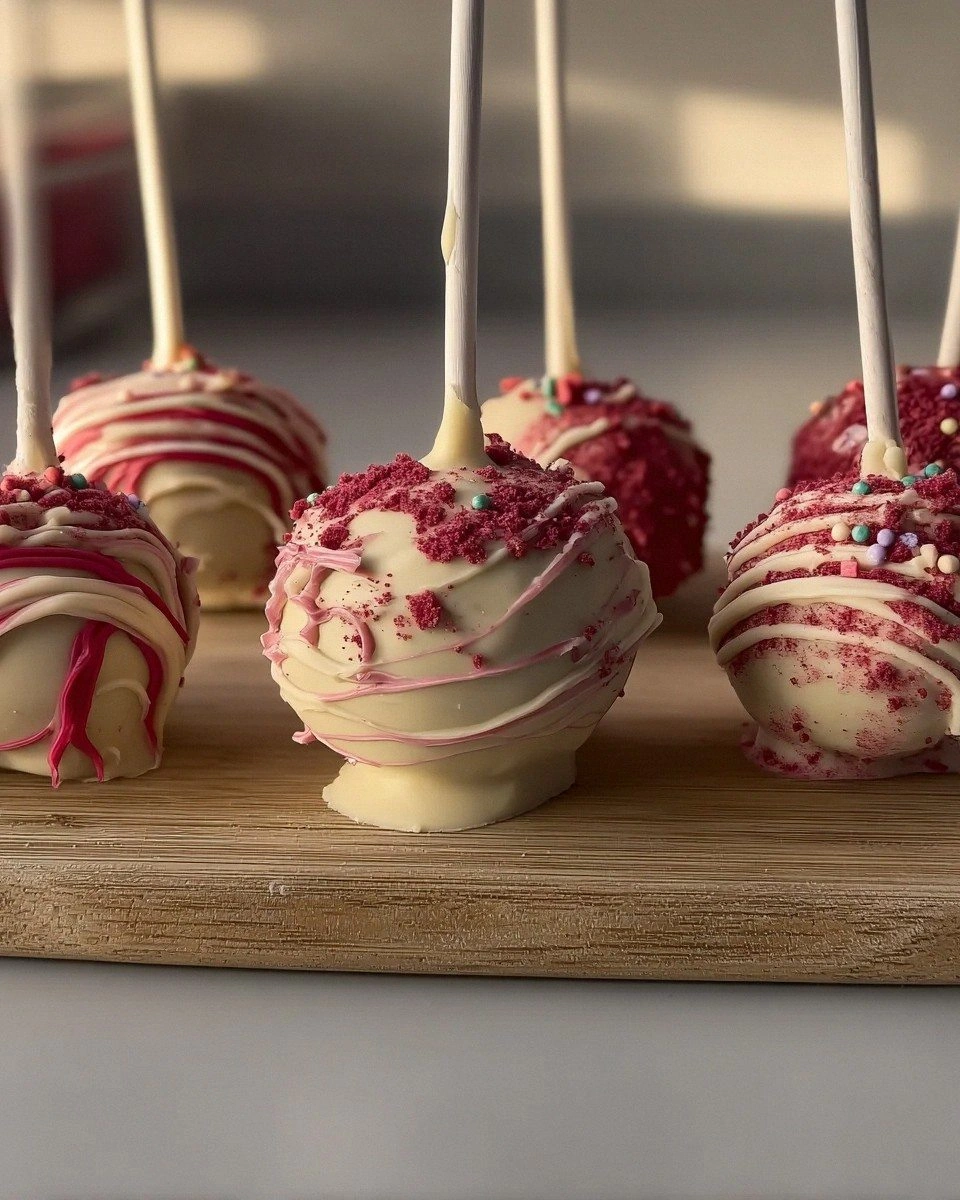
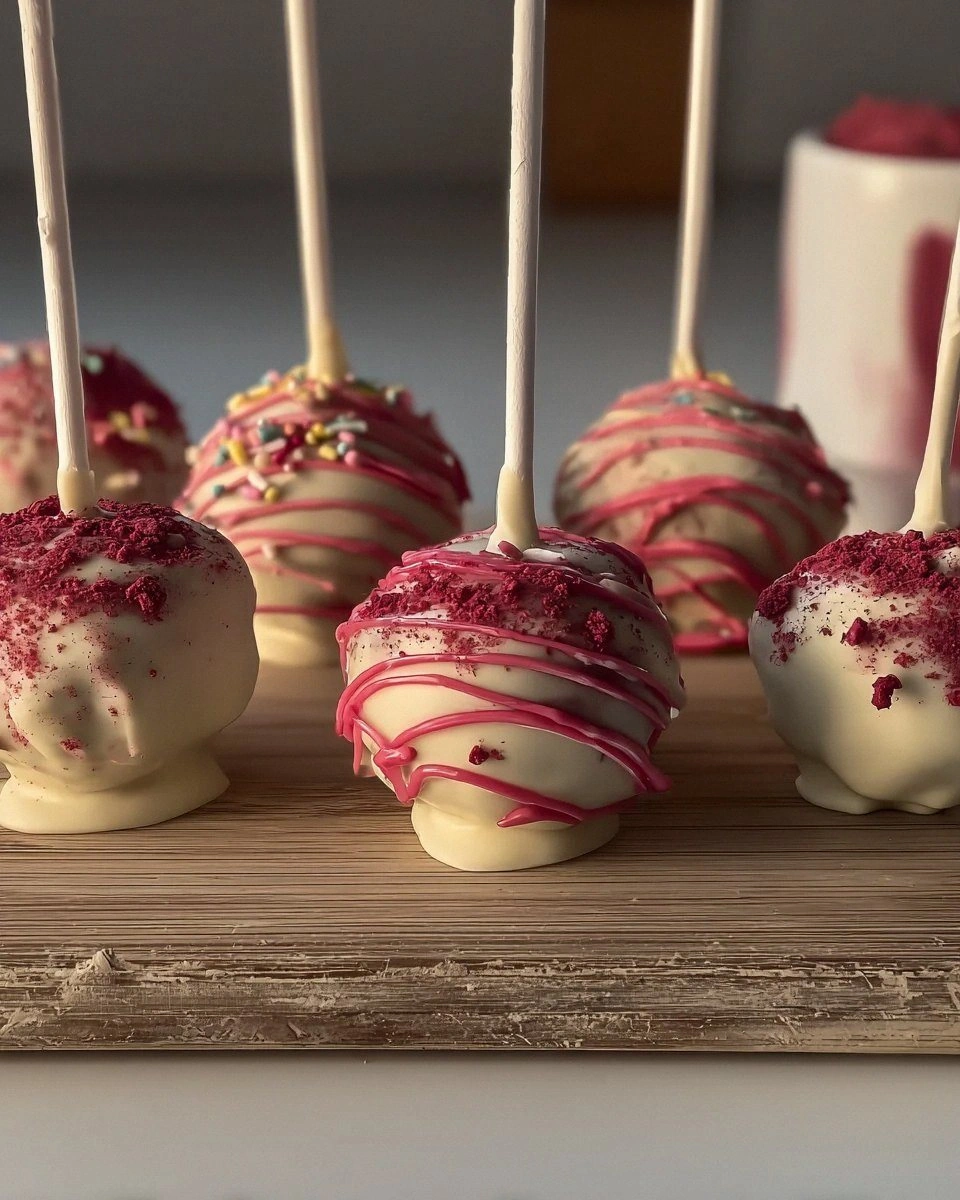
Look, I was going to bring a respectable plate of cookies to my neighbor's holiday open house—something safe, something Martha-Stewart-approved. Then my stand mixer twisted my arm (those things have minds of their own, swear) and whispered, "Let's make red velvet cake pops instead." Two hours later I was standing in a kitchen that looked like Cupid had exploded, clutching a lopsided sphere of crimson velvet crumb and cream cheese frosting, questioning every life choice that had led me to this moment. Fast-forward past a quick freeze, a dunk in silky chocolate, and a shower of festive sprinkles, and I was biting into the most ridiculous bite of dessert I'd ever made: fudgy cake compressed into truffle form, cloaked in a chocolate shell that snapped like thin ice, with that tell-tale whisper of cocoa and buttermilk that makes red velvet... well, red velvet. I ate six before the chocolate even set. Respectability is overrated.
Here's the thing: most cake-pop tutorials treat you like you're running a bakery production line—cutting perfect circles of sheet cake, weighing crumbs on a jeweler's scale, rolling with surgical gloves. I'm not that kind of baker and I'm betting you aren't either. I want the freedom to smash, stir, and shape by hand, to make pops that look charmingly homemade rather than plastic-perfect. This recipe embraces the mess, celebrates the thumbprints and chocolate drizzles, and still delivers a finished product that'll make your friends swear you secretly apprenticed under a French pâtissier. We'll bake one fluffy red velvet sheet cake, crumble it into velvet sand, bind it with just enough tangy cream cheese frosting, roll generous truffles, and give them a glossy chocolate bath. The payoff? Cake you can eat in two bites without a fork, plate, or napkin—perfect for parties, lunchboxes, or devouring over the sink at midnight.
What makes these pops the stuff of neighborhood legend isn't just the show-stopping color; it's the balance. Not too sweet (thanks to a restrained hand with the frosting), not too dense (we'll aerate that crumb properly), and coated in chocolate thin enough to bite through without chipping a tooth. I dare you to taste the first one and not go back for seconds. Picture yourself arranging them on a platter, the crimson centers peeking through clear candy bags, the whole kitchen smelling like Willy Wonka's factory collided with a Southern bakery. Stay with me here—this is worth every sprinkle-covered second.
What Makes This Version Stand Out
- Flavor Depth: A whisper of espresso powder amplifies the cocoa so the chocolate notes actually sing rather than whisper behind the red food coloring.
- Texture Nirvana: We under-bake the cake just slightly, ensuring the crumbs stay moist and squishy even after a freeze-dip combo.
- Fool-Proof Coating: A teaspoon of coconut oil thins melted chocolate into a pourable lava that sets glossy and crackly—no candy thermometer drama.
- Make-Ahead Magic: Roll, freeze, and forget; they keep for a month. Dip the morning you need them and you'll look like a superhero of planning.
- Crowd Reaction: People lose their minds over handheld cake. Expect squeals, photo shoots, and at least one marriage proposal (happened to me last July).
- Ingredient Quality: Pure butter, real buttermilk, and decent cocoa make supermarket mixes weep in envy; you can taste the authenticity.
- Simplicity: One bowl for the cake, one for frosting, one for chocolate. That's it—no specialty pans, no piping bags, no stress.
Alright, let's break down exactly what goes into this masterpiece...
Inside the Ingredient List
The Flavor Base
Cake flour gives a softer crumb than all-purpose, but if you only have AP, swap it and subtract two tablespoons per cup—less protein means tenderness. Dutch-process cocoa brings a deeper, smoother chocolate note than natural; if you can't find it, natural works, but Dutch is the velvet in red velvet. A teaspoon of white vinegar reacts with baking soda to lift the batter and keep the color vibrant; skip it and your cake may sink faster than my willpower around frosting.
The Texture Crew
Buttermilk is non-negotiable. The acid tenderizes gluten, leaving you with a pillowy interior that mashes perfectly into fudgy pop centers. If you're out, whisk a cup of milk with a tablespoon of vinegar and wait five minutes—boom, instant buttermilk. Butter should be room temp so it creams into sugar like fluffy clouds; cold butter refuses to aerate and you'll end up with pound-cake density. Eggs need to be room temperature too, or they'll seize the butter and create tiny greasy pockets.
The Unexpected Star
One teaspoon of espresso powder doesn't make the cake taste like coffee; it just cranks the cocoa volume to eleven. If you've ever complained red velvet is "just sweet with no chocolate," this is your missing link. Can't find espresso powder? Swap in dark instant coffee, but double the quantity. And yes, use gel red food coloring—liquid dilutes the batter and you'll need half the bottle for the same color punch.
The Final Flourish
Cream cheese frosting binds the crumbs; too much and pops slide off sticks, too little and they crumble like my resolve on leg day. Aim for a 3:1 cake-to-frosting ratio by weight. For the shell, use high-quality bar chocolate, not chips—chips contain stabilizers that refuse to thin smoothly. A tablespoon of coconut oil makes the chocolate drape like satin and sets with that satisfying snap when you bite in.
Everything's prepped? Good. Let's get into the real action...
The Method — Step by Step
- Preheat your oven to 325°F (not 350—lower temp keeps the top domed, not cracked). Butter and line a 9×13-inch pan with parchment, leaving wings so you can lift the cake out like a golden raft. Whisk dry ingredients—flour, cocoa, baking soda, espresso powder, salt—until no cocoa lumps remain; those sneaky pockets will streak your beautiful red later.
- In a separate bowl, beat butter and sugar on medium-high for three full minutes. Set a timer—this isn't a suggestion. You're whipping air into the fat so the cake rises proud and tall. The mixture should lighten to pistachio ice-cream shade. Add eggs one at a time, letting each fully incorporate; scrambled eggs are a vibe at brunch, not in cake batter.
- Reduce speed to low and stream in buttermilk, oil, vinegar, and food gel. Crank speed back to medium for thirty seconds; the batter will look like scarlet satin paint. Resist face-planting into it—raw flour is not your friend.
- Fold in dry ingredients by hand with a spatula just until the last flour streak disappears. Over-mixing develops gluten and you'll get rubbery crumbs that refuse to roll smoothly. Pour into the pan, smooth the top, and bake 22-25 minutes. A toothpick should come out with a few moist crumbs—over-baking dries the cake and you'll need more frosting to glue it together.
- Cool completely in the pan on a rack. Warm cake steams itself into mush, and mush equals sad pops. Once cool, lift the cake out using the parchment wings and crumble it into a large bowl with clean fingers. Channel your inner child destroying a sandcastle—go to town until you have fine, even crumbs the size of couscous.
- Add cream cheese frosting a few tablespoons at a time, mixing with a spatula until the crumbs hold together when squeezed. You want the mixture slightly tacky but not greasy. Think homemade play-doh that smells like heaven.
- Scoop two-tablespoon mounds, roll between palms until smooth, and place on a parchment-lined sheet. If the dough sticks, dust your hands with powdered sugar. Insert lollipop sticks halfway into each ball—use a gentle twisting motion so you don't split the sphere. Freeze 30 minutes to set; this prevents the dreaded pop-slide-off later.
- Melt chocolate with coconut oil in a narrow, deep cup—tall and slim lets you dunk without spooning chocolate everywhere. Working in batches, dip each cold pop straight down, pull up, and twirl gently to shed excess. Immediately decorate with sprinkles before the shell sets; chocolate hardens faster than you can say "baker's dozen."
- Stick upright in a foam block or an overturned colander to dry. The shell will set in under five minutes, but let them rest 15 so the interior temp equalizes—this prevents condensation inside your storage container later.
That's it—you did it. But hold on, I've got a few more tricks that'll take this to another level...
Insider Tricks for Flawless Results
The Temperature Rule Nobody Follows
Keep everything cold until the moment of dipping; warm cake balls soften and slide off sticks into your chocolate like tragic Olympic divers. Conversely, chocolate should be just warm enough to flow—about body temperature. Too cool and it drags, too hot and it cracks. Test by touching a dab to your lip; it should feel like a warm bath, not a scald.
Why Your Nose Knows Best
When the chocolate hits the frozen pop you'll smell a quick bloom of rich cocoa—this is your cue to start twirling off excess. If you wait longer, the shell thickens and you'll get gloppy elephant-skin finish. Trust the aroma; it's the kitchen equivalent of Spider-Man's spidey sense.
The 5-Minute Rest That Changes Everything
After rolling but before freezing, let the truffles sit uncovered in the fridge for five minutes. This dries the surface slightly so chocolate grabs on instead of sliding off like a shy cat. A friend tried skipping this step once—let's just say her kitchen looked like a crime scene of red cake carnage.
Creative Twists and Variations
This recipe is a playground. Here are some of my favorite ways to switch things up:
Mocha Velvet Pops
Swap two tablespoons of buttermilk for strong cold brew and add a teaspoon of cocoa powder to the frosting. Dip in dark chocolate and dust with espresso sugar for a buzz-worthy treat that doubles as afternoon fuel.
White Chocolate Winter Wonderland
Use white candy melts spiked with a tablespoon of melted coconut oil. Roll in shredded coconut while the coating is tacky; they'll look like tiny snowballs and taste like a tropical vacation collided with Christmas.
Peanut Butter Lover's Dream
Replace half the cream cheese frosting with creamy peanut butter. The salty-sweet combo is outrageous. Drizzle with melted milk chocolate and scatter crushed honey-roasted peanuts on top for crunch.
Spicy Velvet
Add half a teaspoon of cayenne to the cake batter and a pinch of cinnamon to the frosting. The subtle heat creeps up after the chocolate melts on your tongue—perfect for friends who think dessert is boring.
Lemon Velvet Sunshine
Skip cocoa entirely, use lemon zest and yellow food coloring, and bind with lemon cream cheese frosting. Dip in white chocolate tinted with a drop of yellow. They're like handheld sunshine for gray February days.
Storing and Bringing It Back to Life
Fridge Storage
Store finished pops upright in an airtight container lined with parchment, layers separated by more parchment. They'll keep five days in the fridge, but good luck having them last five hours. Bring to room temp 15 minutes before serving so the cake softens and the chocolate regains its snap.
Freezer Friendly
Undipped pops freeze beautifully for up to a month. Arrange in a single layer on a tray, freeze solid, then transfer to a zip bag. Dip straight from frozen—no need to thaw. Dipped pops also freeze, but condensation can spot the chocolate; if you must, wrap each in wax paper and thaw overnight in the fridge.
Best Reheating Method
There really isn't one—cake pops are meant to be enjoyed cold or room temp. If your chocolate has bloomed (white streaks), gently warm a pop in your hand for a minute and the streaks will vanish as cocoa butter reabsorbs. Add a tiny splash of water to the storage container before sealing; the slight humidity keeps the cake from drying out like forgotten Halloween candy.