Picture this: it’s a sweltering Saturday afternoon, the thermostat is screaming, and you’ve just been dared by your roommate to whip up something that screams “vacation” without leaving the apartment. I stared at my pantry, imagined a beach breeze, and almost set the oven on fire trying to flambé a pineapple—yeah, that was a disaster. The smoke alarm sang its mournful wail, the kitchen smelled like a burnt tropical fruit stand, and I swore off any “exotic” cooking for a week. Then, while scrolling through a sea of half‑baked recipes, I stumbled upon a simple sheet‑pan concept that promised the flavors of a Hawaiian luau with the ease of a weekday dinner.
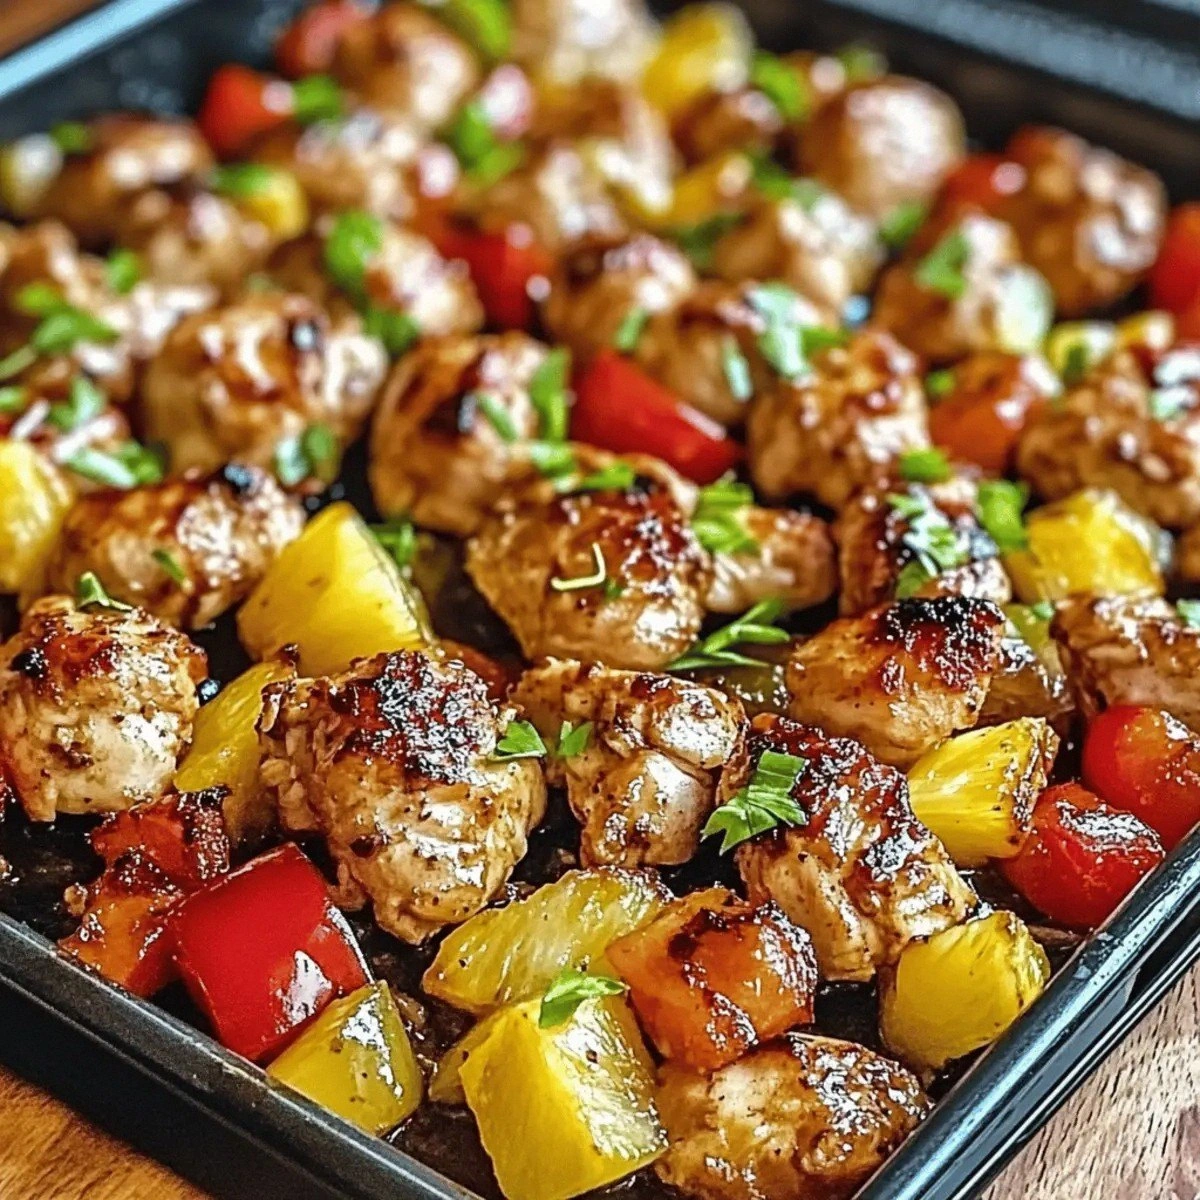
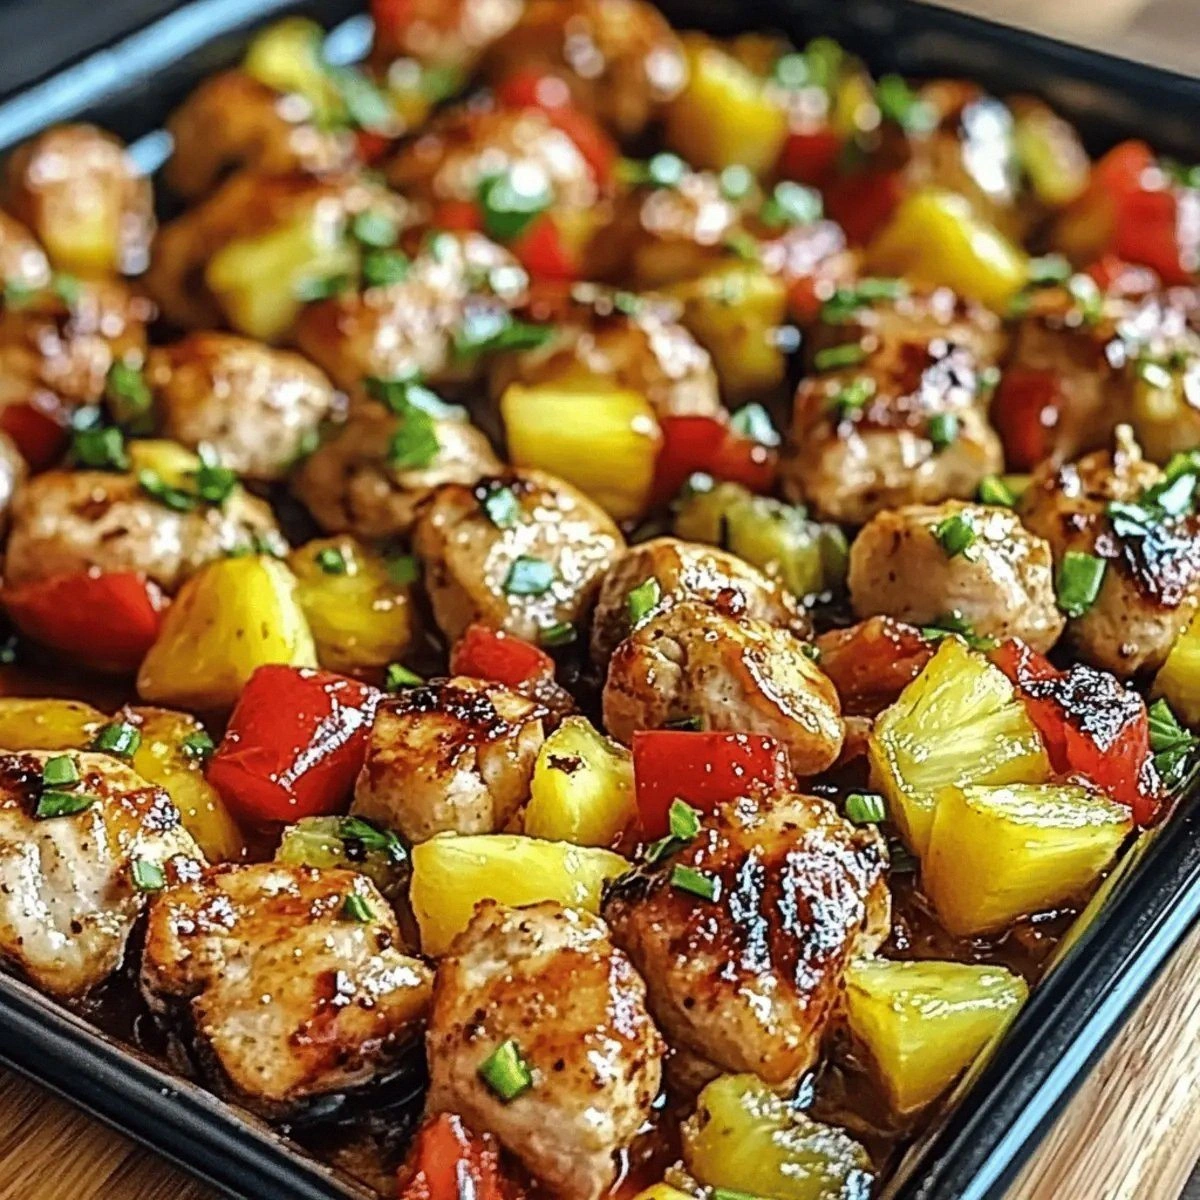
Fast forward to the moment I pulled the pan out of the oven: the chicken was caramelized to a deep amber, the bell peppers had softened into glossy ribbons, and the pineapple chunks glistened with a sticky, tangy glaze that made my mouth water before I even took a bite. The aroma was a perfect mash‑up of sweet and savory, a scent that reminded me of a beachside grill where the ocean mist mixes with the scent of grilling meat. You could hear the faint sizzle of the sauce as it hit the hot pan, feel the heat radiating from the metal, and taste the burst of juicy pineapple that cut through the richness of the chicken like a tropical sunrise.
Most versions of Hawaiian chicken either drown the meat in a sugary sauce or leave the vegetables soggy and limp. This version, however, hits the sweet spot (literally) by using a high‑heat sheet pan that gives the chicken a crispy edge while keeping the interior tender and juicy. The secret? A quick marinate in teriyaki, a splash of pineapple juice, and a strategic placement of veggies so they roast, not steam. The result is a dish that feels like a vacation on a plate, but with the simplicity of a one‑pan dinner that even a kitchen novice can nail.
And here’s the kicker: I’m going to throw in a little trick with a dash of cornstarch that creates a glossy, restaurant‑quality glaze without any fancy equipment. I dare you to taste this and not go back for seconds. Trust me, this is hands down the best version you’ll ever make at home, and I’m about to spill every detail.
Let me walk you through every single step — by the end, you’ll wonder how you ever made it any other way.
What Makes This Version Stand Out
- Flavor Explosion: The marriage of teriyaki and pineapple creates a sweet‑savory balance that coats each bite like a tropical hug.
- Texture Symphony: Crispy chicken edges, tender‑crisp veggies, and juicy pineapple chunks give you a mouthfeel that’s both satisfying and surprising.
- One‑Pan Simplicity: No pots, no pans, no mess—just a sheet pan, a timer, and a happy stomach.
- Ingredient Quality: Using fresh bell peppers and real pineapple chunks (not canned) elevates the dish from “okay” to “wow”.
- Crowd‑Pleaser Factor: Even the pickiest eaters love the caramelized edges and the hint of island sunshine.
- Make‑Ahead Magic: You can prep the chicken and veggies the night before, store them, and pop them in the oven for a quick dinner.
- Versatile Base: Swap broccoli for snap peas, or use chicken thighs instead of breasts, and the dish still shines.
- Time Efficiency: From prep to plate in under an hour, perfect for busy weekdays or lazy weekends.
Inside the Ingredient List
The Flavor Base
The star of the show is the 1/2 cup Teriyaki sauce. This sauce brings umami depth, a subtle sweetness, and a glossy finish that makes the dish look as good as it tastes. If you skip it, you’ll lose that signature Asian‑inspired tang that balances the pineapple’s brightness. For a lower‑sodium version, opt for a reduced‑salt teriyaki or make your own with soy sauce, ginger, and a splash of honey. When choosing a brand, look for one that lists real soy and ginger rather than high fructose corn syrup as the first ingredient.
The Texture Crew
1.5 lbs Chicken thighs or breasts provide the protein backbone. Thighs stay juicy even at higher heat, while breasts give a leaner bite. If you use skinless breasts, consider pounding them to an even thickness so they cook uniformly. The chicken’s natural fats help the sauce cling and caramelize; without that, you’ll end up with a dry, flavor‑less piece. I always buy bone‑in, skin‑on thighs for maximum flavor, then trim the skin if you prefer less greasiness.
2 cups Bell peppers (any color) add crunch, color, and a mild sweetness that complements the pineapple. Red peppers bring extra vitamin C and a pop of visual drama. If you slice them too thin, they’ll burn; too thick, they stay raw. Aim for ½‑inch strips so they roast just right. If you’re allergic to nightshades, substitute with zucchini or carrots for a similar bite.
The Unexpected Star
1 cup Pineapple chunks are the surprise hero. Their acidity cuts through the richness of the chicken, while their sugars caramelize into little golden nuggets that add texture. Fresh pineapple is best; it’s juicier and less mushy than canned. If you only have canned, drain it well and pat dry to avoid excess liquid that can steam the veggies. A quick tip: toss the chunks with a pinch of salt before cooking to intensify their flavor.
The Final Flourish
1 medium Onion brings a subtle sweetness when roasted, creating a flavor foundation that supports the teriyaki glaze. Slice it into wedges so it caramelizes without burning. If you love a bit of bite, keep the outer layers; if you prefer mild, peel them off. 1 cup Broccoli or snap peas adds a pop of green and a crisp snap that contrasts the soft pineapple. Snap peas stay bright and crunchy, while broccoli offers a heartier bite. Both absorb the glaze beautifully, turning green veggies into edible confetti.
Everything's prepped? Good. Let’s get into the real action...
The Method — Step by Step
Start by preheating your oven to 425°F (220°C). This high heat is the secret weapon that creates those coveted crispy edges on the chicken while giving the vegetables a gentle roast. While the oven warms up, line a large rimmed sheet pan with parchment or a silicone mat; this prevents sticking and makes cleanup a breeze. The moment the oven hits temperature, you’ll hear a faint hum that signals it’s ready for action.
In a large bowl, combine the teriyaki sauce, a tablespoon of pineapple juice (reserved from the chunks), and a teaspoon of cornstarch. Whisk until the mixture is smooth and glossy. The cornstarch will thicken the glaze during roasting, giving it that restaurant‑style sheen. Taste the mixture—if you crave extra heat, a dash of sriracha can add a subtle kick without overpowering the tropical vibe.
Pat the chicken pieces dry, then toss them in the teriyaki mixture until every surface is coated. Let the chicken sit for five minutes; this short marination window lets the flavors penetrate without making the meat mushy. While the chicken marinates, you can prep the veggies—this is where multitasking shines.
Slice the bell peppers into ½‑inch strips, quarter the onion, and separate the broccoli florets or snap peas. Toss all the veggies in a separate bowl with a drizzle of olive oil, a pinch of salt, and a splash of the remaining teriyaki glaze. Ensure each piece is lightly coated—this helps them caramelize evenly.
Arrange the chicken pieces in a single layer on the sheet pan, leaving a little space between each. Scatter the vegetables around the chicken, not on top, so the heat can circulate. Drop the pineapple chunks across the pan, distributing them evenly for caramelized bursts in every bite.
Slide the pan into the oven and roast for 20 minutes. At the 10‑minute mark, give the veggies a quick toss with a spatula to ensure even browning. You’ll notice the edges of the chicken starting to pull away from the pan and the pineapple turning a deep amber—this is the flavor building.
After 20 minutes, increase the oven temperature to 450°F (230°C) for an extra 5‑7 minutes. This final blast of heat creates a glossy, slightly charred glaze that makes the dish look Instagram‑ready. Keep a close eye; you want that caramelization, not a burnt disaster.
When the chicken reaches an internal temperature of 165°F (74°C) and the veggies are tender‑crisp, pull the pan out. Let the dish rest for three minutes; this allows the juices to redistribute and the glaze to thicken a touch more. The kitchen will be filled with a sweet‑savory perfume that makes everyone wonder what’s cooking.
Serve the chicken and veggies straight from the pan, or transfer to a serving platter for a more polished look. Garnish with a sprinkle of chopped cilantro or toasted sesame seeds if you like a nutty finish. Pair with steamed jasmine rice or cauliflower rice for a complete meal. And now the fun part—dig in and watch everyone go back for seconds.
That's it — you did it. But hold on, I've got a few more tricks that'll take this to another level...
Insider Tricks for Flawless Results
The Temperature Rule Nobody Follows
Most home cooks start at 375°F and wonder why the chicken is soggy. Cranking the oven to 425°F or higher ensures a quick sear that locks in moisture while giving the exterior a caramelized crunch. The high heat also encourages the sugars in the pineapple to caramelize without turning mushy. I once tried a low‑and‑slow approach and ended up with a steamed mess—lesson learned.
Why Your Nose Knows Best
The moment you smell the sweet‑savory aroma rising from the pan, you know you’re on the right track. If the scent is faint, the oven isn’t hot enough; if it’s overpowering, you’re nearing over‑caramelization. Trust that nose signal more than the clock. I once set a timer for 30 minutes, but the smell told me to pull the pan at 27 minutes—saved the dish from a bitter finish.
The 5‑Minute Rest That Changes Everything
Resting the chicken for just a few minutes after roasting lets the juices settle, preventing a dry bite. During this rest, the glaze thickens slightly, creating a clingier coating. Skip this step and you’ll see the sauce slide off the meat like a bad haircut. It’s a tiny pause that makes a massive difference.
Veggie Placement Mastery
Place denser vegetables (like carrots or broccoli) on the outer edges of the pan where the heat is most intense, and softer ones (like bell peppers) closer to the center. This ensures every veggie reaches the perfect level of tenderness. A friend once piled everything in the middle and ended up with soggy peppers—don’t repeat that mistake.
Sauce Thickening Shortcut
If after roasting the glaze looks too thin, whisk in a splash of cornstarch slurry (1 tsp cornstarch mixed with 1 tbsp water) and return the pan to the oven for two minutes. The heat will activate the starch, giving you a glossy, clingy sauce that looks restaurant‑ready. This trick salvages any accidental over‑liquidity.
Creative Twists and Variations
This recipe is a playground. Here are some of my favorite ways to switch things up:
Mango Madness
Swap the pineapple for fresh mango cubes. The mango adds a buttery sweetness that pairs beautifully with the teriyaki, creating a smoother flavor profile. It’s perfect for those who prefer less tang.
Spicy Island
Introduce thinly sliced jalapeños or a drizzle of sriracha into the glaze. The heat cuts through the sweetness, giving the dish a bold kick that will impress spice lovers.
Coconut Coconut
Add a splash of coconut milk to the teriyaki mixture for a creamy, tropical twist. The coconut mellows the acidity and adds a luxurious mouthfeel.
Grain Bowl Upgrade
Serve the chicken and veggies over quinoa, brown rice, or cauliflower rice. The extra grain turns the dish into a hearty bowl that’s perfect for meal prep.
Herbaceous Finish
Finish with a handful of fresh basil or cilantro just before serving. The herb adds a bright, aromatic layer that lifts the entire plate.
Storing and Bringing It Back to Life
Fridge Storage
Allow the leftovers to cool to room temperature, then transfer them to an airtight container. They’ll stay fresh for up to three days. Reheat in a skillet over medium heat, adding a splash of water to revive the glaze.
Freezer Friendly
Portion the cooked chicken and veggies into freezer‑safe bags, removing as much air as possible. They freeze well for up to two months. To reheat, thaw overnight in the fridge, then bake at 350°F for 15‑20 minutes, adding a drizzle of teriyaki to prevent dryness.
Best Reheating Method
The secret to a perfect reheated bite is a quick sear. Heat a non‑stick pan, add a teaspoon of oil, and toss the leftovers for 3‑4 minutes until the edges crisp again. The splash of water trick (just a tablespoon) creates steam that keeps the chicken moist while the pan restores the caramelization.