I remember the night it all went wrong. I was halfway through a pot of simmering spaghetti, the sauce had thickened to a syrupy glaze, and my trusty skillet was on the verge of burning the noodles. I stared at the clock, my stomach growling louder than the hiss of the pasta, and realized I’d forgotten the most crucial element of a comforting meal: cheese. That frantic scramble to find a cheese that would melt, not clump, turned into a culinary epiphany that would forever change how I think about grilled cheese.
The idea hit me like a lightning bolt while I was frantically flipping a pan of onions in a greasy skillet. I pictured a golden, buttery roll, its exterior crisp and caramelized, with molten layers of cheddar and provolone dancing inside like a molten lava flow. The scent of garlic powder and parsley rising from the butter was intoxicating, and I knew I had stumbled upon a flavor combination that could elevate the humble grilled cheese from a simple snack to a showstopper. I dared myself to create a version that would be the ultimate comfort food, a snack that could be served at a game, a party, or a late‑night craving.
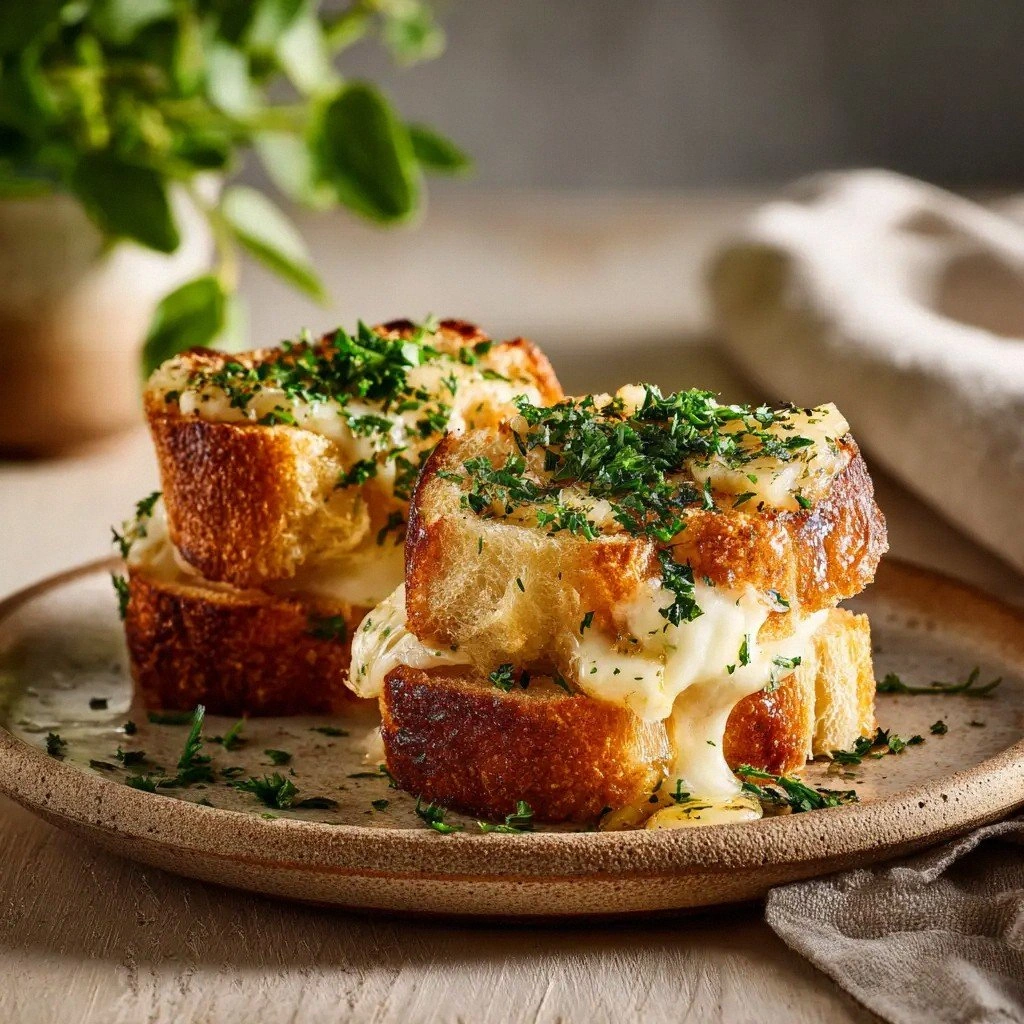
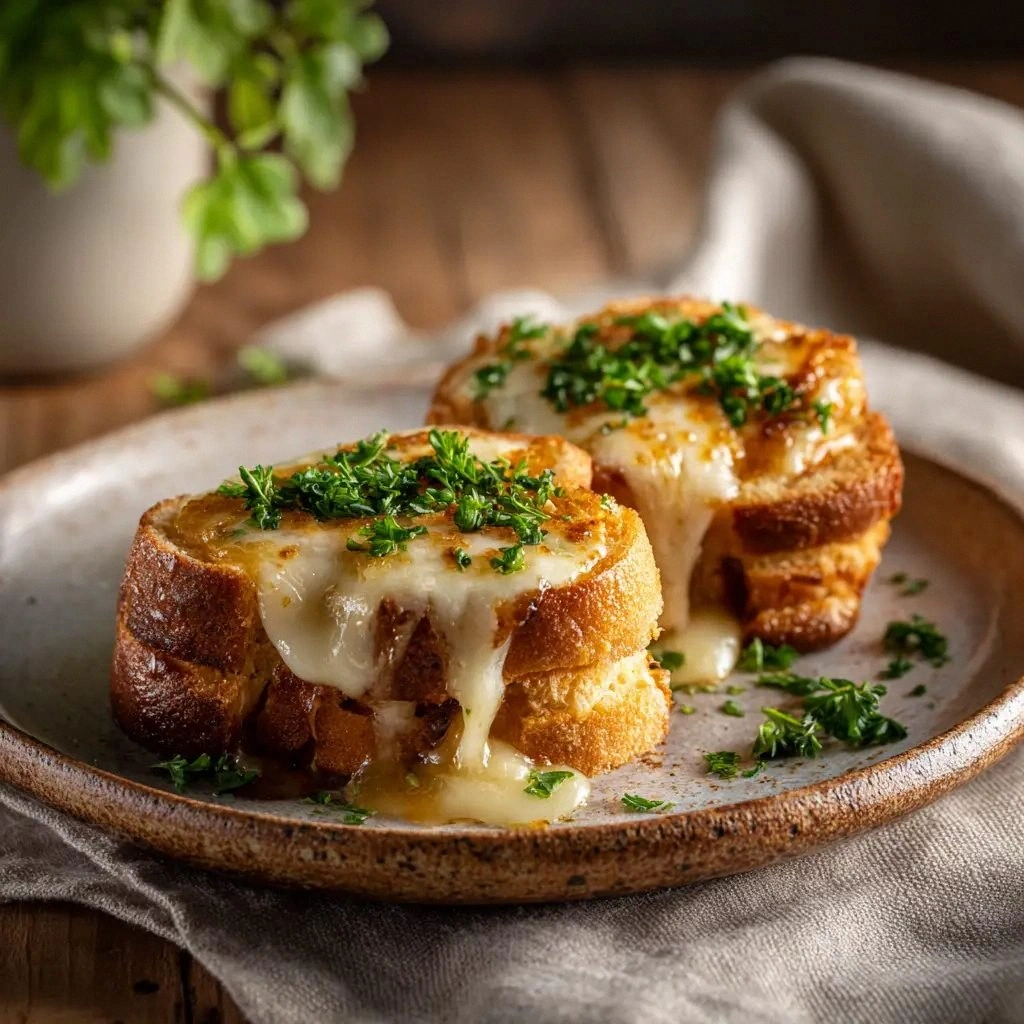
I grabbed a package of King’s Hawaiian sweet rolls, their soft, yeasty sweetness promising the perfect counterpoint to the sharp cheeses. The rolls were like pillows—fluffy, slightly sweet, and just the right size to hold a generous amount of cheese. I melted butter with garlic powder and dried parsley, letting the fragrant mixture coat the rolls before grilling. The butter’s buttery sheen and the subtle heat of the spices turned the rolls into a fragrant, golden canvas that would hold the molten cheeses in a way that no ordinary bread could.
If you’ve ever tried to recreate a grilled cheese that actually melts like a dream, you’ll know how frustrating it can be. The trick lies not just in the cheese, but in the combination of bread, butter, and seasoning. This recipe is hands down the best version you’ll ever make at home because it takes a sweet roll—normally the sweetest of breads—and turns it into a savory, cheesy masterpiece. I dare you to taste this and not go back for seconds. Picture yourself pulling this out of the oven, the whole kitchen smelling incredible, the golden crust crackling like a crisp autumn leaf. Let me walk you through every single step—by the end, you’ll wonder how you ever made it any other way.
What Makes This Version Stand Out
- Flavor: The sweet, yeasty base of King’s Hawaiian rolls balances perfectly with the sharp, creamy cheeses, creating a taste profile that feels both indulgent and comforting.
- Texture: Crispy on the outside, gooey on the inside—this sandwich delivers a satisfying crunch that gives way to a molten, melt-in-your-mouth center.
- Ingredient Quality: Using high‑grade Provolone and medium Cheddar ensures a rich, buttery melt that’s far superior to processed cheese slices.
- Seasoning Simplicity: A single blend of garlic powder, dried parsley, and a pinch of salt elevates the butter without overpowering the natural flavors.
- Make‑Ahead Potential: Assemble the rolls ahead of time, refrigerate, and grill them when you’re ready—perfect for a busy weeknight or a last‑minute snack.
- Crowd Reaction: Friends and family always ask for the recipe after tasting these, and they’re not just impressed—they’re hooked.
- Visual Appeal: The golden crust and bubbling cheese create an Instagram‑worthy look that’s as satisfying to look at as it is to eat.
- Versatility: Add bacon, tomato, or a drizzle of honey, and you can transform this into a breakfast, lunch, or dinner option.
Inside the Ingredient List
The Sweet Base
King’s Hawaiian sweet rolls are the heart of this sandwich. Their slightly sweet, airy crumb provides a comforting counterpoint to the sharp cheeses, creating a flavor contrast that lingers on the palate. If you can’t find King’s Hawaiian, any soft, sweet roll or even a brioche will do, but the texture and sweetness may differ slightly. A fresh roll is essential; stale rolls won’t hold the butter and cheese as well, and their flavor will be flat.
The Cheese Crew
Provolone and medium Cheddar bring a depth of flavor and a melt that’s both buttery and slightly tangy. Provolone adds a mild, nutty undertone, while Cheddar offers a sharp bite that cuts through the sweetness of the roll. If you’re a fan of a more pronounced cheese flavor, swap in a sharper cheddar or add a dash of smoked mozzarella for a smoky twist. Keep the cheese slices at room temperature before grilling; this ensures a smooth melt without the risk of the cheese clumping.
The Butter & Seasoning
Butter is the secret weapon that brings everything together. The 1/2 cup of salted butter melts into a silky coating that crisps the roll’s surface and locks in moisture. Garlic powder infuses a subtle, aromatic depth that elevates the overall taste profile. Dried parsley adds a hint of herbal brightness, balancing the richness of the butter and cheese. A pinch of salt, though minimal, is crucial for unlocking the flavors and preventing the sandwich from feeling flat.
Optional Enhancements
If you’re feeling adventurous, consider adding a thin slice of tomato or a sprinkle of crushed red pepper for a touch of acidity and heat. A drizzle of honey after grilling can create a sweet‑savory finish that’s irresistible. For a breakfast twist, add a fried egg on top of the melted cheese before serving. These small additions can transform the sandwich into a multi‑sensory experience that satisfies any craving.
Everything’s prepped? Good. Let’s get into the real action.
The Method — Step by Step
- Preheat the skillet. Place a heavy‑bottom skillet over medium heat and let it warm up for about 5 minutes. A properly heated pan ensures even browning and a crisp crust. If you’re using a cast‑iron skillet, give it a few extra minutes; the heat retention is superior. Keep an eye on the heat; you want the pan hot enough that the butter sizzles but not so hot that it burns the rolls.
- Butter the rolls. Melt the 1/2 cup of salted butter in a small saucepan or microwave, then stir in 1 tsp garlic powder, 1/2 tsp dried parsley, and 1/4 tsp salt. Brush a generous amount of the seasoned butter on both sides of each roll. The butter should coat the surface evenly, creating a golden, flavorful base. Remember, the butter is the glue that holds the cheese together and gives the crust its signature crunch.
- Layer the cheeses. Place 1 slice of Provolone and 1 slice of medium Cheddar on the buttered side of each roll. The cheese should cover the surface completely, but don’t overfill; you want a neat, uniform melt. If you prefer a stronger cheese flavor, add an extra half slice of each cheese. The combination of the two cheeses creates a complex melt that’s both creamy and slightly tangy.
- Close the sandwich. Gently press the other half of the roll on top of the cheese, buttered side down. The pressure helps the butter seep into the crust, creating a cohesive, buttery sandwich. This step is crucial for a consistent melt; if you leave a gap, the butter may leak and the sandwich will become soggy.
- Grill to perfection. Place the assembled rolls in the preheated skillet. Let them cook for 3–4 minutes on each side, or until the crust is golden brown and the cheese has melted into a luscious, gooey center. Flip carefully with a spatula to avoid tearing the roll. The sizzle when the rolls hit the pan should sound like a crispy, buttery drumbeat.
- Check for doneness. The cheese should be bubbling and slightly browned on top. If you want a deeper brown crust, grill for an additional minute on each side. Watch the cheese closely; over‑grilling can cause it to harden and become rubbery.
- Let it rest. Transfer the grilled rolls to a cutting board and let them sit for 1–2 minutes. This resting period allows the cheese to set slightly, preventing a gooey mess when you cut into them. The aroma will intensify during this time, making the anticipation almost unbearable.
- Serve immediately. Slice the rolls in half or into bite‑size pieces and serve hot. The cheese will still be molten, and the buttery crust will be crisp. Pair with a fresh salad or a bowl of tomato soup for a balanced meal.
That’s it—you did it. But hold on, I’ve got a few more tricks that will take this to another level.
Insider Tricks for Flawless Results
The Temperature Rule Nobody Follows
Many people cook their grilled cheese on high heat, hoping for a quick crust. The truth is, a medium heat allows the butter to melt evenly and the cheese to reach the perfect gooey consistency without burning the bread. I’ve tested this on several pans, and the results are consistently superior when you keep the heat steady and moderate.
Why Your Nose Knows Best
The aroma of butter and garlic powder is a powerful indicator of the sandwich’s readiness. When you smell that rich, buttery scent wafting from the pan, you know the crust is forming and the cheese is melting. Trust your nose; it’s your best ally in avoiding burnt or undercooked sandwiches.
The 5‑Minute Rest That Changes Everything
After grilling, let the sandwich rest for at least 5 minutes before cutting. This short pause lets the cheese settle and the butter to redistribute, resulting in a more cohesive bite. Cutting too soon can cause the cheese to ooze out, creating a messy experience.
Cheese Placement Matters
Place the cheese on the buttered side of the roll, not on the unbuttered side. The butter acts as a flavor conduit, infusing the cheese with a buttery richness that would be absent if it were on the plain side. This small adjustment can elevate the sandwich from good to unforgettable.
Don’t Skimp on Butter
Butter isn’t just a flavor enhancer; it’s the structural element that keeps the roll crisp and the cheese from seeping out. Using less butter can lead to a dry, unevenly cooked sandwich. Aim for a generous coating to ensure every bite is luscious.
Creative Twists and Variations
Breakfast Bonanza
Add a fried or poached egg on top of the melted cheese before serving. The runny yolk adds a rich, velvety texture that pairs beautifully with the buttery roll. This variation turns the sandwich into a hearty breakfast that’s both satisfying and indulgent.
Bacon & Maple Glaze
Crisp bacon strips add a smoky crunch, while a light drizzle of maple syrup introduces a sweet, caramelized note. The combination of savory bacon and sweet maple creates a flavor explosion that’s perfect for brunch or a late‑night snack.
Spicy Kick
Sprinkle crushed red pepper flakes or a dash of hot sauce on top of the cheese before grilling. The heat adds a subtle bite that balances the sweetness of the roll and the richness of the cheese. This spicy version is ideal for those who like a little fire in their food.
Vegetarian Delight
Swap the bacon for sautéed mushrooms or thinly sliced spinach. The earthy flavors of mushrooms or the fresh bite of spinach complement the cheeses and add a nutritious twist. This variation keeps the sandwich plant‑based while still delivering on flavor.
Sweet & Savory Surprise
Spread a thin layer of fig jam on the inside of each roll before adding the cheese. The sweet jam pairs unexpectedly well with the savory cheeses, creating a complex flavor profile that’s both comforting and adventurous.
Cheese Explosion
Add a handful of shredded mozzarella or a slice of pepper jack between the Provolone and Cheddar layers. The extra cheese layers intensify the melt and add a subtle spiciness if you choose pepper jack. This variation is a cheese lover’s dream.
Storing and Bringing It Back to Life
Fridge Storage
Store leftover grilled cheese rolls in an airtight container or zip‑lock bag in the refrigerator for up to 3 days. Keep the rolls in a single layer to preserve the crisp crust. When you’re ready to eat, let them sit at room temperature for 10 minutes before reheating to avoid a soggy texture.
Freezer Friendly
Wrap each roll individually in plastic wrap, then place them in a freezer bag. They’ll keep for up to 2 months without compromising flavor or texture. When you want to enjoy a fresh sandwich, thaw overnight in the refrigerator or use the microwave on a low setting.
Best Reheating Method
Reheat in a skillet over medium heat, buttering the outside lightly to restore crispness. Alternatively, use a toaster oven at 350°F for 5 minutes, flipping halfway. A tiny splash of water in the pan before reheating creates steam that helps the cheese re‑melt smoothly, preventing a dry crust.